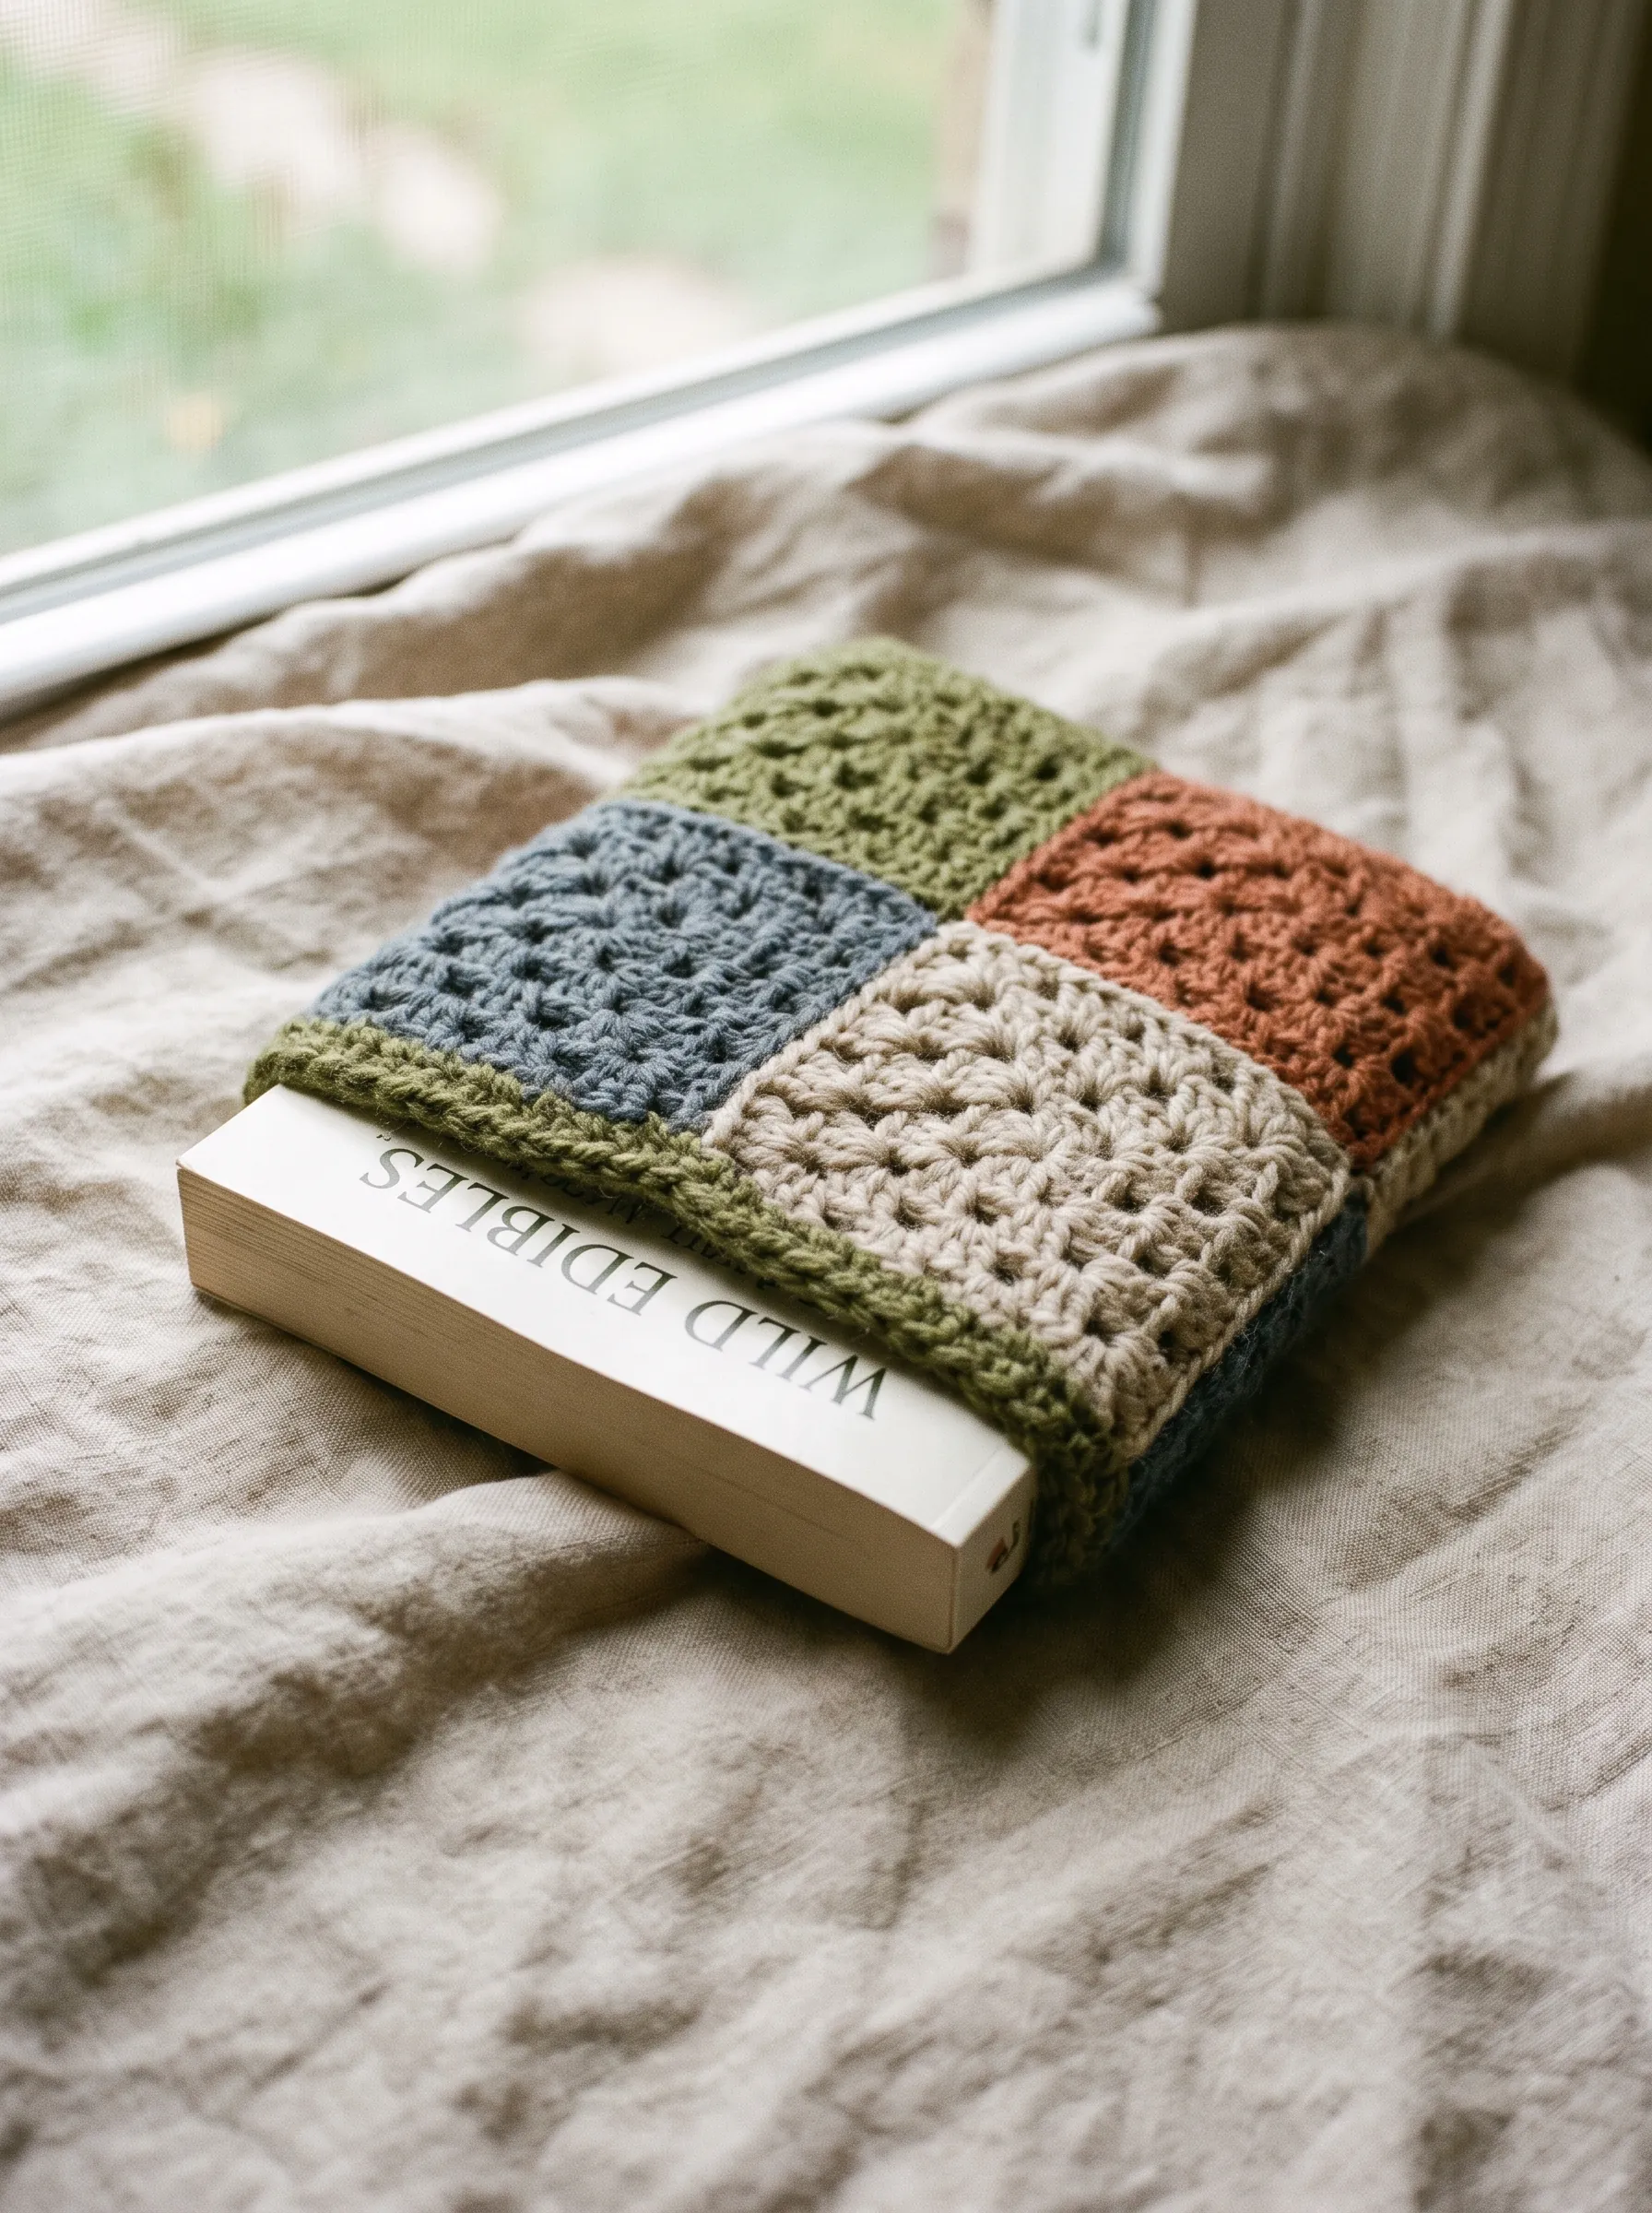
A handmade crochet book cover does far more than make a paperback look charming on a bedside table. It protects precious softcover paperbacks from bruised corners in heavy totes, shields book spines from beach sand, and gives well-loved journals a tactile, warm grip in your hands.
Many store-bought sleeves are made from scratchy synthetic felt or sized so rigidly that a thicker novel refuses to fit. Natural cotton and wool yarns stretch just enough to hug various book dimensions, while ribbing cushions contents against unexpected drops and scratches.
Whether you need a quick sleeve for an e-reader, a cover with a brass pen loop for field sketching, or an envelope pouch with a carved wooden button, the sixteen designs below are sized around standard paperback, hardcover, and e-reader dimensions.
Each pattern breakdown covers recommended yarn fibers, hook sizing, stretch allowances, and practical tips so your handmade cover fits like a bespoke leather jacket from the very first row.
Table of Contents 19 sections
Crochet Book Covers at a Glance
Compare difficulty, yarn recommendations, closure styles, and typical make times across popular book sleeve designs.
| Design | Best For | Yarn Weight | Closure Style | Make Time |
|---|---|---|---|---|
| Classic Ribbed Hardcover | Novels, journals | Worsted wool blend | Fitted inner flaps | 3 hours |
| Granny Square Sleeve | Paperbacks, gifts | DK cotton | Open slip pocket | 2.5 hours |
| Minimalist Moss Stitch | Notebooks, diaries | Sport cotton | Attached braided ribbon | 2 hours |
| Button-Flap Pouch | Travel paperbacks | Worsted cotton | Envelope wooden button | 3.5 hours |
| Braided Cable Jacket | Hardcover classics | Aran wool | Turned inner sleeves | 4.5 hours |
| Two-Tone Waffle Wrap | Thick fiction, study texts | Worsted cotton | Flexible flap | 4 hours |
| Built-In Pen Pocket | Bullet journals, planners | Cotton linen blend | Elastic sleeve band | 3 hours |
| Front Slip-Pocket Sleeve | Books + reading glasses | DK cotton blend | Drop-in pocket | 3 hours |
| Padded E-Reader Sleeve | Kindle, Kobo devices | Bulky cotton | Snug friction fit | 1.5 hours |
| Daisy Applique Wrap | Gift novels, poetry | DK mercerized cotton | Folded flap | 3 hours |
| Wrap-Around Tie Jacket | Variable-page books | Sport wool blend | Braided wrap cord | 2.5 hours |
| Heavyweight Study Cover | Reference books, Bibles | Worsted cotton cord | Reinforced spine flaps | 5 hours |
| Geometric Tapestry Sleeve | Hardback journals | Fingering cotton | Flat slip case | 4 hours |
| Dual-Pocket Student Caddy | Textbooks, highlighters | Worsted cotton | Twin exterior pockets | 3.5 hours |
| Leaf-Bookmark Wrap | Bedside reading | DK linen cotton | Attached motif bookmark | 2.5 hours |
| Coordinated Stack Trio | Studio shelf display | Worsted wool blends | Mixed fitted flaps | 8 hours set |
1. Classic Ribbed Hardcover Jacket

The classic ribbed jacket uses vertical rows of back-loop single crochet to build a soft, stretchy accordion fabric. Because the ribbing stretches horizontally across the book width, the cover accommodates slim 200-page memoirs and dense 500-page volumes with equal ease.
Measure your open book from the inside edge of the front cover board, across the spine, to the inside edge of the back cover. Add two inches for tuck-in flaps. Work your foundation chain to match the exact height of the book, then crochet rows until the piece matches your measured open length.
Fold the outer two inches of each side inward to form sleeves for the front and back cover boards. Slip-stitch the top and bottom seams closed. The resulting ribbed jacket hugs the spine tightly and stays in place when you turn pages during late-night reading sessions.
2. Granny Square Paperback Sleeve

Granny squares are inherently modular, making them the easiest way to customize a book pouch to custom dimensions. Four 4-inch squares joined in a 2x2 grid form one side of a standard trade paperback sleeve; join two matching panels around three sides, and your book pouch crochet project is ready.
Cotton yarn is essential for book sleeves because it resists pilling and provides structural rigidity. Avoid loose lacy square designs; opt for dense traditional cluster squares or solid single-crochet granny variations so book corners cannot poke through between stitches.
For a clean finish, join the squares using a slip stitch on the wrong side and finish the open top with two rounds of reverse single crochet to create a firm, non-curling rim that endures heavy daily handling.
3. Minimalist Moss Stitch Cover with Bookmark Ribbon

Moss stitch (alternating single crochet and chain-1 spaces) mimics the refined texture of woven linen. It is exceptionally flat and snag-resistant, making it ideal for daily notebooks carried inside cluttered backpacks alongside other everyday items.
This style pairs beautifully with pieces in our crochet wearables collection, where subtle earthy tones and practical textures create durable handmade accessories designed for busy daily routines.
To build the integrated ribbon, continue working your top border until you reach the center spine marker. Chain 35 stitches outward from the spine, turn, slip stitch back down the chain, and attach a small wooden bead to complete a functional crochet bookmark that stays anchored.
4. Button-Flap Envelope Book Pouch

When traveling, an open-topped sleeve can allow coins, keys, or loose pens to slip inside the pages. The button-flap pouch extends the back panel into a triangular or rounded envelope flap that fastens securely over the front face of your paperback novel.
Crochet a continuous long rectangle equal to two and a half times the book height. Fold the bottom section up to form the pouch pocket, seam the sides with a neat mattress stitch, and decrease evenly across the remaining top flap to form a centered point.
Fasten an olivewood or coconut-shell button to the front wall, using the natural gap between crochet stitches on the flap as a built-in buttonhole. Much like the gift ideas featured in our crochet accessories ideas, this pouch makes a memorable present.
5. Braided Cable Hardcover Jacket

Cable stitches turn a simple book wrap into a library heirloom piece. Two 6-stitch cable panels running vertically up the front cover create dimensional ridges that feel luxurious to hold while reading in a comfortable armchair by the fire.
Work the cables using front-post treble crochets crossed over skipped stitches on right-side rows, backed by rows of half double crochet. Because cable stitches pull the fabric horizontally, swatch your cable section before cutting yarn to ensure your cover does not end up too narrow.
Line the inside of the cables with thin cotton muslin if you plan to wrap vintage cloth-bound books, preventing any natural wool friction against delicate book cloth and preserving the antique binding.
6. Two-Tone Waffle Stitch Book Wrap

If your primary concern is drop protection for an expensive reading device or hardbound textbook, the waffle stitch is your best ally. The three-dimensional grid structure traps pockets of air, creating a natural bumper cushion nearly a centimeter thick.
Work the body in warm mustard ochre, then switch to undyed natural oatmeal cotton for the inner spine flaps and perimeter border. The two-tone contrast highlights the architectural geometry of the post stitches and gives the wrap an artisan studio appearance.
Make sure to wash your finished waffle wrap in cold water and dry it flat before slipping it over a book; cotton waffle settles into its final compact density after its first wash, providing maximum shock absorption.
7. Built-In Pen-Holder Journal Cover

For writers, journalers, and sketching artists, a book cover without a pen holder means searching through bag pockets every time inspiration strikes. This design incorporates a narrow vertical tube directly onto the front cover seam to keep pens secure.
After completing the front pocket flap, join yarn three inches below the top rim and crochet 8 rows of 4 single crochets. Fold the tab into a loop and slip stitch the end back to the cover surface using a tapestry needle for a strong anchor.
Mercerized cotton provides the firm, non-stretchy grip required for pen loops; soft wools stretch out over time, causing pens to slip out when inverted inside a tote bag.
8. Front Slip-Pocket Book Sleeve

An exterior slip pocket transforms a basic crochet book sleeve into a complete mobile study station. Crochet a smaller secondary rectangle matching the lower two-thirds of the sleeve front face, and seam it around three sides during the final border assembly.
This pocket holds reading glasses, annotation tabs, or botanical bookmarks flat against the cover without bulging into the book pages or creasing delicate paper margins during transit.
Work the pocket in half-double crochet worked between the posts to maintain a dense, opaque wall that will not stretch out with heavy daily use and constant retrieving of stationery items.
9. Padded E-Reader and Kindle Sleeve

Digital reading devices have fragile glass substrates that require firm protection against bending and point impacts inside bags. Making a dedicated kindle crochet sleeve using thermal single crochet creates a solid, thick wall of fiber that absorbs knocks.
Measure your device with its hard plastic bumper case attached, and subtract half an inch from the total circumference; the sleeve should slide on with gentle friction so the device cannot accidentally slip out when picked up upside down.
Finish with a closed bottom worked continuously in the round to eliminate any bulky bottom seam that could press against your device charging port while packed inside a travel bag.
10. Daisy Applique Pastel Book Jacket

For readers who love vintage cottage aesthetics, flat floral appliqués offer personality without adding unmanageable bulk. Keep your petals flat by using half double crochets rather than puffy cluster stitches that can snag on bag interiors.
Sew each daisy onto the right-side cover panel using matching thread and small whip stitches caught into the back of each petal. This keeps the edges tacked down flat so they glide smoothly into book bags.
Pair warm terracotta or soft sage background yarn with crisp white petals and a honey-yellow center for a timeless, earthy look that brings vintage warmth to contemporary novels.
11. Adjustable Wrap-Around Tie Cover

Standard fitted covers fail when you switch between paperbacks of varying page counts. The wrap-around tie cover solves this by using one fixed spine sleeve on the left side and an extended open flap on the right that folds around pages of any thickness.
After sliding the front cover board into the fixed sleeve, wrap the extra crochet fabric across the pages and tuck it under a braided tie wound twice around the exterior of the closed book.
Linen-cotton yarn is the ideal fiber here: it softens with handling, drapes smoothly around irregular thicknesses, and resists wrinkling when tied and untied repeatedly throughout the week.
12. Heavyweight Ribbed Study Bible Cover

Heavy reference volumes like study Bibles, art books, and dictionaries weigh several pounds and can quickly stretch out flimsy acrylic covers. Using 2 mm braided cotton cord creates an indestructible, rigid jacket that supports the spine during long study sessions.
Work deep 3.5-inch inner flaps to anchor the heavy front and back boards firmly. Reinforce the inner spine crease with a row of tight slip stitches worked along the exterior fold line to act as a structural hinge that opens flat.
This design lies flat when the book is opened on a desk, without bunching up behind the spine or curling over the margin text while you take notes.
13. Geometric Tapestry Crochet Sleeve

Tapestry crochet carries the unused yarn color inside the active stitches, which automatically doubles the fabric thickness and eliminates horizontal give. The resulting sleeve feels as dense as fine woven canvas, protecting pages well.
Work clean Scandinavian geometric arches or chevron patterns using a tight gauge. Because the fabric has zero stretch, add a full inch to your book perimeter measurement when chaining your foundation oval, which is half an inch on each side of the flat tube.
The smooth, firm interior will not snag on paperback corners, and the modern graphic exterior looks striking displayed on coffee tables and nightstands.
14. Dual-Pocket Student Caddy Sleeve

College students and avid non-fiction readers who highlight as they read will appreciate the dual-pocket caddy. A single front overlay panel is divided into two unequal pockets with a vertical row of top-stitched slip stitches: one wide pocket for notes, and one narrow slot for highlighters.
Work the pocket in a contrasting neutral yarn to make the compartments easy to locate in low evening light across dorm desks or library tables.
Ensure the dividing seam is back-tacked three times at the top rim to withstand constant pulling when pens and sticky flags are slid in and out during study sessions.
15. Attached Leaf-Bookmark Novel Wrap

There is nothing more frustrating than having a loose bookmark slip between airplane seats. This design incorporates a 12-inch crochet vine that branches into three delicate tapered leaves at its tip, anchored directly into the top spine seam.
Bamboo-cotton blend yarn gives the bookmark ribbon a silky, fluid drape that lies flat between pages without creasing delicate paper margins or distorting spine bindings.
The leaves dangle decoratively past the bottom edge of the closed book, adding an organic botanical touch to your bedside table that looks lovely resting on linen sheets.
16. Coordinated Three-Piece Reader Stack

For book lovers with curated bookshelves, a trio of matching crochet covers creates an orderly, serene aesthetic. By choosing a cohesive trio of colors, such as soft chalk white, warm taupe, and muted sage, you can dress your current reading stack in uniform harmony.
Vary the stitch patterns slightly across each size while maintaining the same yarn brand and weight throughout the set to preserve textural unity.
How to Measure Your Book for a Custom Crochet Book Cover
Hold a tape measure against the book and write down three numbers: the height, the width of the front cover, and the thickness of the spine. A trade paperback often measures about 8 inches tall, 5.5 inches wide, and 1 inch thick, but publishers vary, so always measure your own copy.
For a wrap-style jacket, add the front width, the spine, and the back width. In this example that is 5.5 plus 1 plus 5.5, or 12 inches. A non-stretchy stitch needs another half inch, so the foundation row measures 12.5 inches, which is 50 stitches at four stitches per inch.
Use the same method for height: measure, multiply by your row gauge, and test-fit a swatch around the real book before you finish the cover. The Craft Yarn Council's standard yarn weight system is a handy reference if you are swapping the yarn named in a design.
Tied with natural hemp twine, making a custom crochet book cover set transforms everyday reading into a tactile, cozy ritual that lasts through every chapter. With durable cotton yarn and neat corner joins, your handmade sleeve guards precious pages through years of travel and bedside reading.
Frequently Asked Questions
How do I size a crochet book cover so it fits snugly?
Measure your book height, front width, spine thickness, and back width. For stretchy ribbed patterns, crochet to exact measurements with zero ease. For non-stretchy stitches like single crochet, add half an inch to the total width, or one inch to the full perimeter when you work in the round.
What is the best yarn for a crochet book cover?
Mercerized cotton or cotton-linen blends are the best choices. Cotton has high abrasion resistance, resists pilling when slid in and out of bags, and holds crisp stitch definition over years of use. Avoid loose acrylic yarns, which can stretch out permanently under tension.
Can I wash my crochet book covers?
Yes. Cotton book covers can be hand-washed in lukewarm water with mild soap, pressed between towels to remove excess moisture, and dried flat. For best results, slip the damp cover over a wrapped book or cardboard template to dry into its exact shape.
How do I prevent the edges of the book sleeve from curling?
Work a final round of reverse single crochet or slip stitches loosely around the opening rim. Adding a firmer perimeter border locks the live edges, keeps tension uniform across corners, and prevents the fabric from rolling outward over time.
Save This for Later
Pin this guide to your crochet board so it is ready when you start your next project.
Save on Pinterest